Let’s be real – finding that perfect vintage piece feels like striking gold. But when you get home and notice a tiny tear or missing button, your heart sinks. Don’t worry! I’ve spent years learning how to repair vintage clothing (sometimes the hard way), and I’m here to share everything I know about bringing these beautiful old pieces back to life.
First Things First: What You’ll Need in Your Repair Kit

Trust me, you don’t want to be mid-repair when you realize you’re missing something crucial. Here’s what should be in your vintage repair toolkit:
Your basic must-haves:
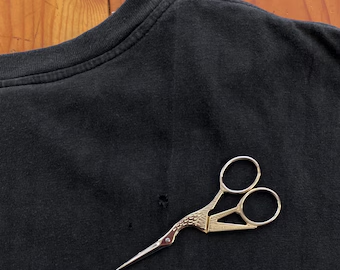
- Sharp scissors (fabric-only – don’t you dare use these on paper!)
- Hand-sewing needles in different sizes (those tiny ones are lifesavers for silk)
- Thread that matches your vintage pieces (pro tip: stock up on basic vintage-appropriate colors)
- Straight pins and safety pins (more than you think you need)
- A measuring tape and ruler
- Fabric markers that actually wash out (test them first!)
The “level-up” tools I swear by:
- A darning egg (game-changer for sweater repairs)
- Needle-threading tools (because life’s too short for squinting)
- A really good iron and pressing cloth
- A magnifying glass (your eyes will thank you)
Before You Start Cutting or Sewing…
Here’s something I learned the hard way: vintage clothes are constructed totally differently from modern pieces. That’s why you can’t just attack them with modern repair techniques and expect good results.
If you’re working with anything pre-1960s, you’re likely dealing with:
- Hand-finished everything (seriously, everything)
- Buttons that were custom-made for the garment
- Interior structure that puts modern clothes to shame
- The most intricate darts and pleats you’ve ever seen
Common Repairs (And How to Actually Do Them)
When You’ve Got a Torn Seam
This is probably the most common vintage clothing issue I see. Here’s my tried-and-true process:
- First, deep breath – it’s probably not as bad as you think
- Remove any loose threads (carefully!)
- Look at how the seam was originally sewn
- Match your thread as closely as possible
- Follow the original seam line exactly
- Press it when you’re done (but use a pressing cloth!)
The Case of the Missing Button
Finding a perfect match for vintage buttons is like finding a needle in a haystack. But here’s what works:
- Check the inside hem or seam allowance – sometimes there’s a spare!
- If you can’t match it exactly, replace the whole set
- Save those old buttons though – they might match something else later
- Always reinforce the backing when you sew new buttons on
Dealing with Tears and Holes
This is where things get interesting. For small tears:
- Stabilize the area first (I like using a lightweight interfacing)
- If you need to patch, find fabric from the hem if possible
- Match your grain lines (this is super important!)
- Use tiny, tiny stitches
- Press carefully to blend the repair
When to DIY and When to Run to a Professional
Let’s be honest about what you can handle at home.
Go ahead and DIY if you’re dealing with:
- Simple seam fixes
- Basic button replacement
- Small tears along a seam
- Hem adjustments
- Minor snags
But please seek professional help for:
- Anything beaded (seriously, save yourself the headache)
- Valuable pieces you can’t bear to lose
- Major structural issues
- Anything involving serious alterations
Special Materials Need Special Care
Silk
Working with vintage silk requires the patience of a saint. Use the finest needles you can thread, and handle the fabric like it’s made of spider webs. Always support the fabric while you’re working – I like to use a piece of tissue paper underneath.
Wool
Vintage wool can be surprisingly forgiving to work with. Just watch out for moth damage when you’re repairing it. Steam is your friend here, but always test on a hidden spot first.
Early Synthetics
These can be tricky because they’ve often degraded over time. Always test the heat of your iron – I’ve melted more than one vintage synthetic piece in my early days (we don’t talk about those disasters).
My Top Tips for Successful Repairs
- Document everything! Take photos before you start – you’ll thank yourself later
- Keep your workspace clean and well-lit
- Never rush a repair (learn from my mistakes)
- Test everything on a scrap first
- When in doubt, sleep on it before making any big decisions
Wrapping It Up

Remember, every vintage piece tells a story, and your repairs are just adding to its history. Don’t be afraid to tackle simple repairs – we all started somewhere! But also know when to hand it over to a professional. Your future self (and your vintage clothes) will thank you.
Got questions about a specific repair? Drop them in the comments below! I love helping fellow vintage enthusiasts keep their treasures in top shape.
P.S. Don’t forget to sign up for my newsletter for more vintage clothing care tips and tricks!